Pirates of the Caribbean At World's End: Misja 9 - Davy Jones' Locker (2)
Aktualizacja:
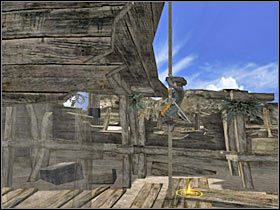
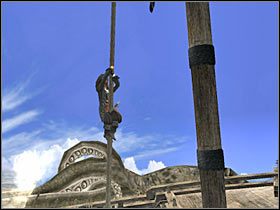
Jak się zapewne domyślasz, będziesz musiał skorzystać ze znajdującej się tu liny, tak aby móc przedostać się na wyżej położoną półkę (#1). Po znalezieniu się na pokładzie zniszczonego statku skorzystaj ze schodków i zniszcz skrzynie, dzięki czemu będziesz mógł podnieść drugi wisiorek (#2).
 |  |
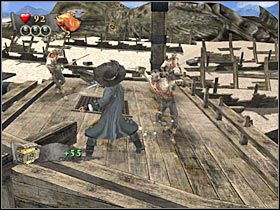
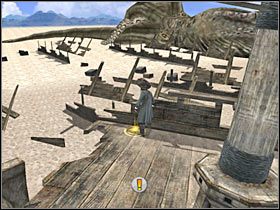
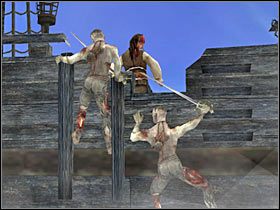
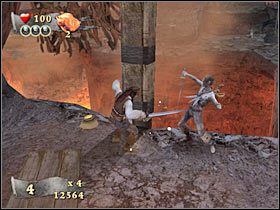
Będziesz tu oczywiście musiał pokonać kilka potworów (#1). Radziłbym się jednak bardziej pilnować, gdyż teren walki jest bardzo ograniczony. Mimo wszystko byłbyś tu w stanie np. zdobyć wymagany mnożnik. Na koniec zajmij się potworem znajdującym się na lewej belce (#2). To właśnie tam będziesz się teraz musiał udać.
 |  |
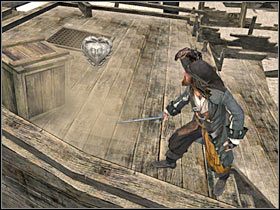
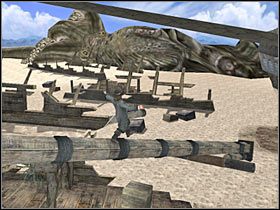
Biegnij teraz po szkielecie. Będziesz musiał rozprawić się z pojedynczym truposzakiem. Na szczęście nie jest to miniboss. Wciśnij klawisz akcji, tak aby móc odblokować sobie dalsze przejście (#1). Idź w lewo. Po znalezieniu się na pokładzie statku czeka Cię kolejna dłuższa walka. Podobnie jak wcześniej, to doskonała okazja do zdobycia wymaganego mnożnika (#2).
 | 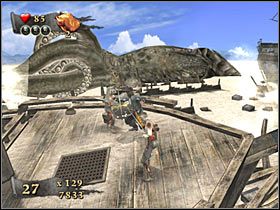 |
Po zebraniu wszystkich sakiewek ze złotem i pokonaniu wszystkich stworów skieruj się w lewo. Będziesz musiał skorzystać z kolejnej liny, tak aby przedostać się na maszt (#1). Dotarcie na górę zajmie ci kilka sekund, tak więc uzbrój się w cierpliwość. Podejdź teraz do liny i wciśnij klawisz akcji (#2), tak aby zjechać w stronę niezbadanego fragmentu wraku statku.
 |  |
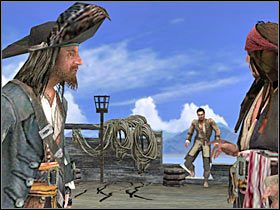
W skrzyniach odnajdziesz jedynie złoto, ale warto je zniszczyć, gdyż musisz przecież zaliczyć jeden z subquestów. Podejdź teraz do zaznaczonego przez grę miejsca i wciśnij klawisz akcji (#1). Po zaliczeniu poznanej już interaktywnej scenki ruszaj w stronę Jacka (#2). Po dotarciu na miejsce załączy się nowa scenka przerywnikowa.
 |  |
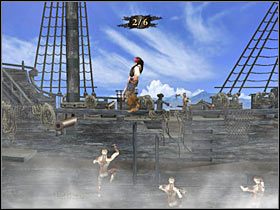
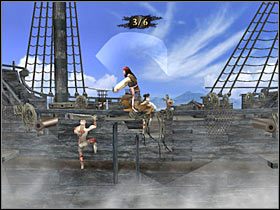
Przygotuj się, gdyż za chwilę odzyskasz częściową kontrolę, tym razem nad postacią Jacka. Twoim zadaniem będzie zrzucanie wspinających się na pokład statku truposzaków (#1). Musisz się jednak liczyć z tym, że bohater będzie bardzo powoli przemieszczał się. Nie przejmuj się więc pojedynczymi potworami, stojąc mniej więcej w środku. Będziesz mógł przepuścić maksimum pięć potworów. Teraz czeka Cię mini-gra "Jackanism" (#2). Będzie ona nieco trudniejsza, tak więc dokładnie (i szybko) wykonuj kolejne polecenia.
 |  |
Po wykonaniu mini-gry po raz kolejny będziesz musiał odpędzać potwory (#1). Zasady nie ulegną tu zmianie. Proponowałbym więc stać w samym środku, tak aby móc dosięgnąć ich najwięcej. Po chwili załączy się nowa scenka przerywnikowa (#2). Zostaniesz przeniesiony w zupełnie nowe miejsce. Do końca misji będziesz też już sterował Jackiem.
 |  |
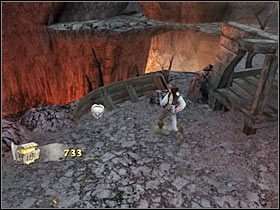
Jak już powiedziałem, zaczynasz w zupełnie nowej scenerii. Na początek proponowałbym zniszczyć wszystkie okoliczne skrzynie. To bardzo ważne, gdyż w jednej z górnych skrzyń odnajdziesz trzeci wisiorek (#1). Ruszaj w lewo. Po dotarciu do nowej lokacji rozpraw się z pierwszą grupą potworów (#2). Walki w tej okolicy będą zazwyczaj długie, ale niezbyt wymagające. Nie zapominaj o możliwości niszczenia kolejnych skrzyń.
 |  |

- Piraci z Karaibów: Na Krańcu Świata - poradnik do gry
- Piraci z Karaibów: Na Krańcu Świata - poradnik do gry
- Pirates of the Caribbean At World's End: Solucja
- Pirates of the Caribbean At World's End: Misja 1 - Prison Fortress - Subquesty
- Pirates of the Caribbean At World's End: Misja 1 - Prison Fortress (1)
- Pirates of the Caribbean At World's End: Misja 1 - Prison Fortress (2)
- Pirates of the Caribbean At World's End: Misja 1 - Prison Fortress (3)
- Pirates of the Caribbean At World's End: Misja 2 - Isla de Pelegostos - Subquesty
- Pirates of the Caribbean At World's End: Misja 2 - Isla de Pelegostos (1)
- Pirates of the Caribbean At World's End: Misja 2 - Isla de Pelegostos (2)
- Pirates of the Caribbean At World's End: Misja 2 - Isla de Pelegostos (3)
- Pirates of the Caribbean At World's End: Misja 3 - Port Royal - Subquesty
- Pirates of the Caribbean At World's End: Misja 3 - Port Royal (1)
- Pirates of the Caribbean At World's End: Misja 3 - Port Royal (2)
- Pirates of the Caribbean At World's End: Misja 3 - Port Royal (3)
- Pirates of the Caribbean At World's End: Misja 4 - Pearl Vs Dutchman - Subquesty
- Pirates of the Caribbean At World's End: Misja 4 - Pearl Vs Dutchman (1)
- Pirates of the Caribbean At World's End: Misja 4 - Pearl Vs Dutchman (2)
- Pirates of the Caribbean At World's End: Misja 4 - Pearl Vs Dutchman (3)
- Pirates of the Caribbean At World's End: Misja 5 - Tortuga - Subquesty
- Pirates of the Caribbean At World's End: Misja 5 - Tortuga (1)
- Pirates of the Caribbean At World's End: Misja 5 - Tortuga (2)
- Pirates of the Caribbean At World's End: Misja 5 - Tortuga (3)
- Pirates of the Caribbean At World's End: Misja 5 - Tortuga (4)
- Pirates of the Caribbean At World's End: Misja 6 - Isla Cruces - Subquesty
- Pirates of the Caribbean At World's End: Misja 6 - Isla Cruces (1)
- Pirates of the Caribbean At World's End: Misja 6 - Isla Cruces (2)
- Pirates of the Caribbean At World's End: Misja 6 - Isla Cruces (3)
- Pirates of the Caribbean At World's End: Misja 7 - Pearl Vs Kraken - Subquesty
- Pirates of the Caribbean At World's End: Misja 7 - Pearl Vs Kraken (1)
- Pirates of the Caribbean At World's End: Misja 7 - Pearl Vs Kraken (2)
- Pirates of the Caribbean At World's End: Misja 8 - Singapore - Subquesty
- Pirates of the Caribbean At World's End: Misja 8 - Singapore (1)
- Pirates of the Caribbean At World's End: Misja 8 - Singapore (2)
- Pirates of the Caribbean At World's End: Misja 8 - Singapore (3)
- Pirates of the Caribbean At World's End: Misja 9 - Davy Jones' Locker - Subquesty
- Pirates of the Caribbean At World's End: Misja 9 - Davy Jones' Locker (1)
- Pirates of the Caribbean At World's End: Misja 9 - Davy Jones' Locker (2)
- Pirates of the Caribbean At World's End: Misja 9 - Davy Jones' Locker (3)
- Pirates of the Caribbean At World's End: Misja 10 - Sea Battle - Subquesty
- Pirates of the Caribbean At World's End: Misja 10 - Sea Battle (1)
- Pirates of the Caribbean At World's End: Misja 10 - Sea Battle (2)
- Pirates of the Caribbean At World's End: Misja 10 - Sea Battle (3)
- Pirates of the Caribbean At World's End: Misja 11 - Shipwreck City - Subquesty
- Pirates of the Caribbean At World's End: Misja 11 - Shipwreck City (1)
- Pirates of the Caribbean At World's End: Misja 11 - Shipwreck City (2)
- Pirates of the Caribbean At World's End: Misja 11 - Shipwreck City (3)
- Pirates of the Caribbean At World's End: Misja 11 - Shipwreck City (4)
- Pirates of the Caribbean At World's End: Misja 12 - Maelstrom - Subquesty
- Pirates of the Caribbean At World's End: Misja 12 - Maelstrom - (1)
- Pirates of the Caribbean At World's End: Misja 12 - Maelstrom - (2)
- Pirates of the Caribbean At World's End: Misja 12 - Maelstrom - (3)
- Pirates of the Caribbean At World's End: Solucja
- Piraci z Karaibów: Na Krańcu Świata - poradnik do gry
Komentarze czytelników

ach 3 dni się męczyłem żeby znaleść dojście do wodospadu
I takie poradniki lubię... Zresztą "Stranger" robi NAJLEPSZE poradniki!!! Pozdrowienia dla niego! ;)
Zabrania się kopiowanie jakichkolwiek obrazków, tekstów lub informacji zawartych na tej stronie. Strona nie jest powiązana i/lub wspierana przez twórców ani wydawców. Wszystkie loga i obrazki są objęte prawami autorskimi należącymi do ich twórców.
Copyright © 2000 - 2026 Webedia Polska SA wszelkie prawa zastrzeżone.