Pirates of the Caribbean At World's End: Misja 4 - Pearl Vs Dutchman (1)
Aktualizacja:
Dokładny opis przejścia misji:
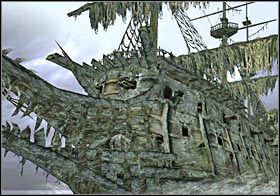
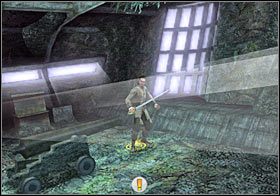
Musisz oczywiście zaczekać aż gra wyświetli kolejny filmik przerywnikowy (#1). Jak zapewne zauważyłeś, w okolicy pojawił się Flying Dutchman. Będziesz musiał odeprzeć pierwszy atak, przedostać się na pokład statku-widma oraz odnaleźć wspominany przez bohaterów obiekt. Przygotuj się, gdyż za chwilę odzyskasz kontrolę nad główną postacią (#2). Radziłbym dokładnie przeczytać poniższy opis, szczególnie jeśli planujesz podnieść wisiorek i jednocześnie nie zawalić całej misji.
 | 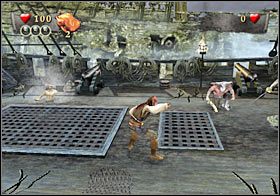 |
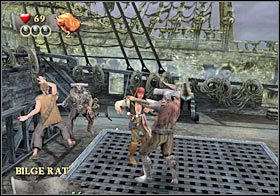
Gdy tylko ta misja rozpocznie się, zignoruj stwory i zacznij biec w prawo (#1). Będziesz musiał dotrzeć do górnych schodków. Wbiegnij na wyższą część pokładu i zniszcz znajdującą się tu skrzynię. Podnieś pierwszy wisiorek. To było całkiem proste, teraz pora na trudniejszą część. Skieruj się na dół. Zniszcz drugą skrzynię i zbiegnij po dolnych schodkach (#2), tak aby uniknąć potworów, które zaczęły za Tobą podążać.
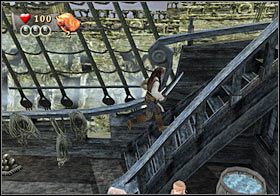 |  |
Musisz wrócić się do punktu startu, a następnie skierować się w okolice lewych górnych schodków (#1). Prawdopodobnie będzie się tam znajdował jeden z potworów, którego zabij. Celem tej misji jest bowiem ochranianie znajdującego się na podwyższeniu Willa. Nie możesz więc dopuścić do tego żeby stwory skorzystały ze schodów, gdyż Will zostałby zabity (#2). Na szczęście będą one podążały wyłącznie w stronę górnych schodków. Dolne są całkowicie bezpieczne.
 | 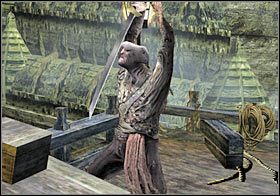 |
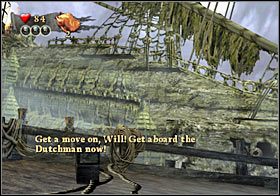
Teraz musisz w dalszym ciągu pilnować tych schodów (#1). W szczególności uważaj na stwory, które pojawią się w górnej części pokładu. Będą one bowiem podążały w stronę Willa. Nie oddalaj się od schodów, gdyż niektóre stwory pojawią się (znikąd) tuż przy schodach. Po zabiciu około ośmiu potworów załączy się scenka przerywnikowa (#2). Jack pozostanie na statku. Will natomiast uda się na pokład Flying Dutchmana, tak aby przystąpić do głównej części tej misji.
 |  |
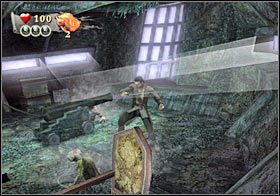
Wykonaj kilka kroków do przodu. Zostaniesz zaatakowany przez nową grupę potworów (#1). Wbrew pozorom, powinno Cię to jednak cieszyć, gdyż jest to DOSKONAŁA okazja do tego żeby uzyskać wymagany przez grę mnożnik (#2). Jak już wcześniej powiedziałem, potwory są wolniejsze, rzadziej blokują i nie musisz się w tak dużym stopniu obawiać kontrataków.
 | 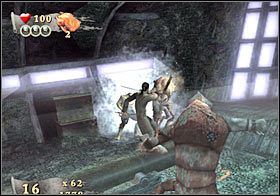 |
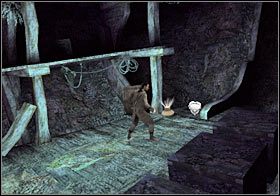
Po załatwieniu stworów zniszcz beczki, a odnajdziesz co najmniej jedną sakiewkę ze złotem. Skorzystaj teraz z armaty (#1), dzięki czemu znajdziesz się na niższym poziomie. Koniecznie skieruj się w prawo i zniszcz beczki, gdyż w jednej z nich ukryty został drugi wisiorek (#2). Obiekt ten należy oczywiście podnieść.
 |  |

- Piraci z Karaibów: Na Krańcu Świata - poradnik do gry
- Piraci z Karaibów: Na Krańcu Świata - poradnik do gry
- Pirates of the Caribbean At World's End: Solucja
- Pirates of the Caribbean At World's End: Misja 1 - Prison Fortress - Subquesty
- Pirates of the Caribbean At World's End: Misja 1 - Prison Fortress (1)
- Pirates of the Caribbean At World's End: Misja 1 - Prison Fortress (2)
- Pirates of the Caribbean At World's End: Misja 1 - Prison Fortress (3)
- Pirates of the Caribbean At World's End: Misja 2 - Isla de Pelegostos - Subquesty
- Pirates of the Caribbean At World's End: Misja 2 - Isla de Pelegostos (1)
- Pirates of the Caribbean At World's End: Misja 2 - Isla de Pelegostos (2)
- Pirates of the Caribbean At World's End: Misja 2 - Isla de Pelegostos (3)
- Pirates of the Caribbean At World's End: Misja 3 - Port Royal - Subquesty
- Pirates of the Caribbean At World's End: Misja 3 - Port Royal (1)
- Pirates of the Caribbean At World's End: Misja 3 - Port Royal (2)
- Pirates of the Caribbean At World's End: Misja 3 - Port Royal (3)
- Pirates of the Caribbean At World's End: Misja 4 - Pearl Vs Dutchman - Subquesty
- Pirates of the Caribbean At World's End: Misja 4 - Pearl Vs Dutchman (1)
- Pirates of the Caribbean At World's End: Misja 4 - Pearl Vs Dutchman (2)
- Pirates of the Caribbean At World's End: Misja 4 - Pearl Vs Dutchman (3)
- Pirates of the Caribbean At World's End: Misja 5 - Tortuga - Subquesty
- Pirates of the Caribbean At World's End: Misja 5 - Tortuga (1)
- Pirates of the Caribbean At World's End: Misja 5 - Tortuga (2)
- Pirates of the Caribbean At World's End: Misja 5 - Tortuga (3)
- Pirates of the Caribbean At World's End: Misja 5 - Tortuga (4)
- Pirates of the Caribbean At World's End: Misja 6 - Isla Cruces - Subquesty
- Pirates of the Caribbean At World's End: Misja 6 - Isla Cruces (1)
- Pirates of the Caribbean At World's End: Misja 6 - Isla Cruces (2)
- Pirates of the Caribbean At World's End: Misja 6 - Isla Cruces (3)
- Pirates of the Caribbean At World's End: Misja 7 - Pearl Vs Kraken - Subquesty
- Pirates of the Caribbean At World's End: Misja 7 - Pearl Vs Kraken (1)
- Pirates of the Caribbean At World's End: Misja 7 - Pearl Vs Kraken (2)
- Pirates of the Caribbean At World's End: Misja 8 - Singapore - Subquesty
- Pirates of the Caribbean At World's End: Misja 8 - Singapore (1)
- Pirates of the Caribbean At World's End: Misja 8 - Singapore (2)
- Pirates of the Caribbean At World's End: Misja 8 - Singapore (3)
- Pirates of the Caribbean At World's End: Misja 9 - Davy Jones' Locker - Subquesty
- Pirates of the Caribbean At World's End: Misja 9 - Davy Jones' Locker (1)
- Pirates of the Caribbean At World's End: Misja 9 - Davy Jones' Locker (2)
- Pirates of the Caribbean At World's End: Misja 9 - Davy Jones' Locker (3)
- Pirates of the Caribbean At World's End: Misja 10 - Sea Battle - Subquesty
- Pirates of the Caribbean At World's End: Misja 10 - Sea Battle (1)
- Pirates of the Caribbean At World's End: Misja 10 - Sea Battle (2)
- Pirates of the Caribbean At World's End: Misja 10 - Sea Battle (3)
- Pirates of the Caribbean At World's End: Misja 11 - Shipwreck City - Subquesty
- Pirates of the Caribbean At World's End: Misja 11 - Shipwreck City (1)
- Pirates of the Caribbean At World's End: Misja 11 - Shipwreck City (2)
- Pirates of the Caribbean At World's End: Misja 11 - Shipwreck City (3)
- Pirates of the Caribbean At World's End: Misja 11 - Shipwreck City (4)
- Pirates of the Caribbean At World's End: Misja 12 - Maelstrom - Subquesty
- Pirates of the Caribbean At World's End: Misja 12 - Maelstrom - (1)
- Pirates of the Caribbean At World's End: Misja 12 - Maelstrom - (2)
- Pirates of the Caribbean At World's End: Misja 12 - Maelstrom - (3)
- Pirates of the Caribbean At World's End: Solucja
- Piraci z Karaibów: Na Krańcu Świata - poradnik do gry
Komentarze czytelników

ach 3 dni się męczyłem żeby znaleść dojście do wodospadu
I takie poradniki lubię... Zresztą "Stranger" robi NAJLEPSZE poradniki!!! Pozdrowienia dla niego! ;)
Zabrania się kopiowanie jakichkolwiek obrazków, tekstów lub informacji zawartych na tej stronie. Strona nie jest powiązana i/lub wspierana przez twórców ani wydawców. Wszystkie loga i obrazki są objęte prawami autorskimi należącymi do ich twórców.
Copyright © 2000 - 2026 Webedia Polska SA wszelkie prawa zastrzeżone.