Pirates of the Caribbean At World's End: Misja 1 - Prison Fortress (1)
Aktualizacja:
Dokładny opis przejścia misji:
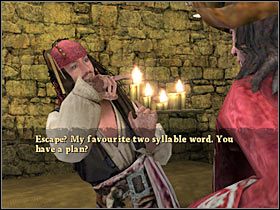
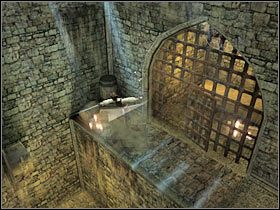
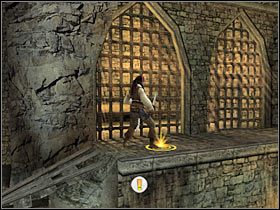
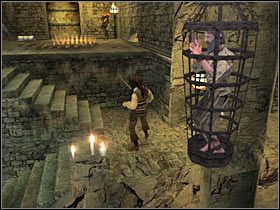
Na początek będziesz oczywiście mógł obejrzeć krótką i nie wnoszącą zbyt dużo do rozgrywki scenkę przerywnikową (#1). Jak zapewne zauważyłeś, zabawę zaczynasz w celi, a Twoim głównym zadaniem tego etapu będzie ucieczka z fortecy. Wyjdź z celi i zniszcz pierwszą beczkę (#2). W środku odnajdziesz pierwszy wisiorek. Kawałek dalej odnajdziesz drugą skrzynię. Tym razem powinieneś odnaleźć zdrówko, choć przedmioty z kolejnych skrzyń czy beczek są zazwyczaj losowane. Skieruj się po schodach na dół.
 |  |
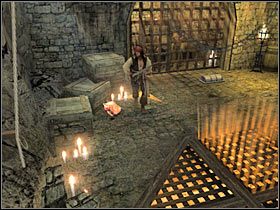
Jeśli chcesz, możesz zniszczyć znajdujące się tu przedmioty, choć tak na dobrą sprawę jakiś obiekt mogą jedynie skrywać: skrzynia znajdująca się na lewo od celi (#1) lub niewielka beczka, stojąca po prawej stronie. Podejdź teraz do więźniów i porozmawiaj z nimi (#2). Przygotuj się, gdyż czeka Cię pierwszy pojedynek!
 | 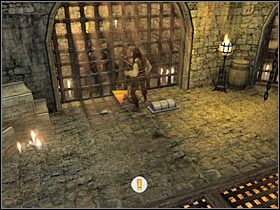 |
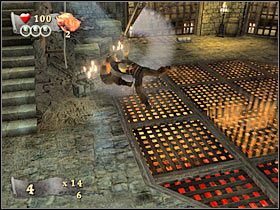
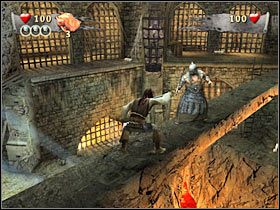
Zabicie dwóch wrogów nie powinni ci sprawić najmniejszych problemów (#1). Radziłbym stawiać na szybsze ataki, szczególnie w początkowej fazie walki. Zerknij jednak na opis dodatkowych questów tego etapu. Przeciwników lepiej byłoby zrzucić w przepaść (#2), wykonując przedstawione już wyżej czynności. Tak czy siak, musisz się ich pozbyć.
 |  |
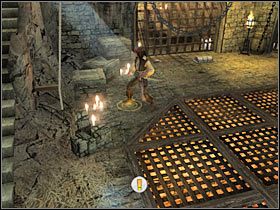
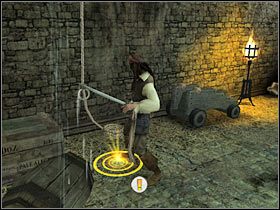
Ponownie udaj się do więźniów, tak aby z nimi porozmawiać. Główny bohater automatycznie ich uwolni. Skieruj się teraz do ukazanego na screenie miejsca (#1) i wciśnij klawisz akcji, dzięki czemu przeniesiesz się w nowe miejsce. Po znalezieniu się na górze skieruj się w prawo. Nie znajdziesz tu żadnych skrzyń. Porozmawiaj z kolejnym więźniem (#2), a następnie skorzystaj z dźwigni. Do odnalezienia masz już tylko dwie cele.
 | 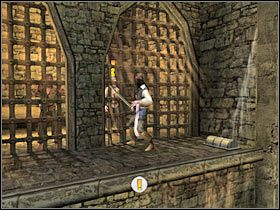 |
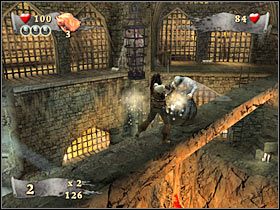
Podejdź teraz w lewo. Odnajdziesz tu kolejny świecący punkt (#1). Skorzystaj z niego. Nie martw się o widocznego na ekranie przeciwnika. Zostanie on strącony w automatyczny sposób. Przed Tobą walka z pierwszym minibossem. Jest ona bardzo prosta. Zgodnie z sugestią gry, powinieneś przede wszystkim blokować ciosy swojego przeciwnika (#2).
 |  |
Czekaj cierpliwie na właściwy moment do wyprowadzenia kontrataku (#1). Radziłbym używać szybkich ciosów. Przy odrobinie szczęścia za każdym razem uderzysz bossa co najmniej trzykrotnie. Po stosunkowo krótkiej walce powinno ci się udać go pokonać (#2). Możesz ruszać w prawo.
 |  |
W oddali powinieneś zauważyć kolejną celę (#1). Musisz się tam teraz udać. Ponownie porozmawiaj z więźniem, a dowiesz się na temat pewnej skrytki. Uwolnij więźnia, korzystając z dźwigni. Po lewej stronie odnajdziesz też skrzynie. Warto je zniszczyć. Skorzystaj teraz z drabiny (#2), po której zejdź na niższy poziom.
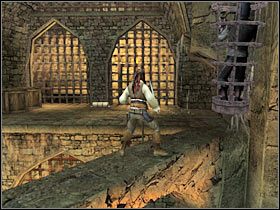 |  |
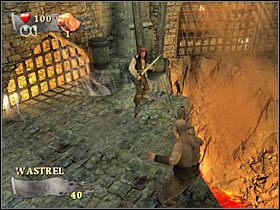
Ruszaj w stronę schodów. Po drodze powinieneś zauważyć drzwi, które są pilnowane przez pojedynczego wartownika (#1). Będziesz się go musiał pozbyć. Skorzystaj teraz z dźwigni, tak aby wejść do środka. Nie odnajdziesz tu niestety żadnych interaktywnych skrzyń czy beczek. Skieruj się więc do zaznaczonego przez grę miejsca i wciśnij klawisz akcji (#2).
 |  |

- Piraci z Karaibów: Na Krańcu Świata - poradnik do gry
- Piraci z Karaibów: Na Krańcu Świata - poradnik do gry
- Pirates of the Caribbean At World's End: Solucja
- Pirates of the Caribbean At World's End: Misja 1 - Prison Fortress - Subquesty
- Pirates of the Caribbean At World's End: Misja 1 - Prison Fortress (1)
- Pirates of the Caribbean At World's End: Misja 1 - Prison Fortress (2)
- Pirates of the Caribbean At World's End: Misja 1 - Prison Fortress (3)
- Pirates of the Caribbean At World's End: Misja 2 - Isla de Pelegostos - Subquesty
- Pirates of the Caribbean At World's End: Misja 2 - Isla de Pelegostos (1)
- Pirates of the Caribbean At World's End: Misja 2 - Isla de Pelegostos (2)
- Pirates of the Caribbean At World's End: Misja 2 - Isla de Pelegostos (3)
- Pirates of the Caribbean At World's End: Misja 3 - Port Royal - Subquesty
- Pirates of the Caribbean At World's End: Misja 3 - Port Royal (1)
- Pirates of the Caribbean At World's End: Misja 3 - Port Royal (2)
- Pirates of the Caribbean At World's End: Misja 3 - Port Royal (3)
- Pirates of the Caribbean At World's End: Misja 4 - Pearl Vs Dutchman - Subquesty
- Pirates of the Caribbean At World's End: Misja 4 - Pearl Vs Dutchman (1)
- Pirates of the Caribbean At World's End: Misja 4 - Pearl Vs Dutchman (2)
- Pirates of the Caribbean At World's End: Misja 4 - Pearl Vs Dutchman (3)
- Pirates of the Caribbean At World's End: Misja 5 - Tortuga - Subquesty
- Pirates of the Caribbean At World's End: Misja 5 - Tortuga (1)
- Pirates of the Caribbean At World's End: Misja 5 - Tortuga (2)
- Pirates of the Caribbean At World's End: Misja 5 - Tortuga (3)
- Pirates of the Caribbean At World's End: Misja 5 - Tortuga (4)
- Pirates of the Caribbean At World's End: Misja 6 - Isla Cruces - Subquesty
- Pirates of the Caribbean At World's End: Misja 6 - Isla Cruces (1)
- Pirates of the Caribbean At World's End: Misja 6 - Isla Cruces (2)
- Pirates of the Caribbean At World's End: Misja 6 - Isla Cruces (3)
- Pirates of the Caribbean At World's End: Misja 7 - Pearl Vs Kraken - Subquesty
- Pirates of the Caribbean At World's End: Misja 7 - Pearl Vs Kraken (1)
- Pirates of the Caribbean At World's End: Misja 7 - Pearl Vs Kraken (2)
- Pirates of the Caribbean At World's End: Misja 8 - Singapore - Subquesty
- Pirates of the Caribbean At World's End: Misja 8 - Singapore (1)
- Pirates of the Caribbean At World's End: Misja 8 - Singapore (2)
- Pirates of the Caribbean At World's End: Misja 8 - Singapore (3)
- Pirates of the Caribbean At World's End: Misja 9 - Davy Jones' Locker - Subquesty
- Pirates of the Caribbean At World's End: Misja 9 - Davy Jones' Locker (1)
- Pirates of the Caribbean At World's End: Misja 9 - Davy Jones' Locker (2)
- Pirates of the Caribbean At World's End: Misja 9 - Davy Jones' Locker (3)
- Pirates of the Caribbean At World's End: Misja 10 - Sea Battle - Subquesty
- Pirates of the Caribbean At World's End: Misja 10 - Sea Battle (1)
- Pirates of the Caribbean At World's End: Misja 10 - Sea Battle (2)
- Pirates of the Caribbean At World's End: Misja 10 - Sea Battle (3)
- Pirates of the Caribbean At World's End: Misja 11 - Shipwreck City - Subquesty
- Pirates of the Caribbean At World's End: Misja 11 - Shipwreck City (1)
- Pirates of the Caribbean At World's End: Misja 11 - Shipwreck City (2)
- Pirates of the Caribbean At World's End: Misja 11 - Shipwreck City (3)
- Pirates of the Caribbean At World's End: Misja 11 - Shipwreck City (4)
- Pirates of the Caribbean At World's End: Misja 12 - Maelstrom - Subquesty
- Pirates of the Caribbean At World's End: Misja 12 - Maelstrom - (1)
- Pirates of the Caribbean At World's End: Misja 12 - Maelstrom - (2)
- Pirates of the Caribbean At World's End: Misja 12 - Maelstrom - (3)
- Pirates of the Caribbean At World's End: Solucja
- Piraci z Karaibów: Na Krańcu Świata - poradnik do gry
Komentarze czytelników

ach 3 dni się męczyłem żeby znaleść dojście do wodospadu
I takie poradniki lubię... Zresztą "Stranger" robi NAJLEPSZE poradniki!!! Pozdrowienia dla niego! ;)
Zabrania się kopiowanie jakichkolwiek obrazków, tekstów lub informacji zawartych na tej stronie. Strona nie jest powiązana i/lub wspierana przez twórców ani wydawców. Wszystkie loga i obrazki są objęte prawami autorskimi należącymi do ich twórców.
Copyright © 2000 - 2026 Webedia Polska SA wszelkie prawa zastrzeżone.