Pirates of the Caribbean At World's End: Misja 11 - Shipwreck City (2)
Aktualizacja:
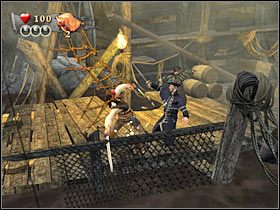
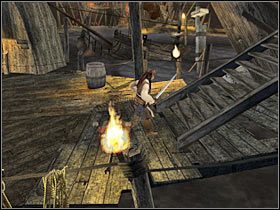
Pozostała ci już tylko jedna przeszkoda do wypełnienia. Oznacza to oczywiście, iż zostaniesz zaatakowany przez nowych wrogów (#1). Tym razem czasu na pozbycie się ich jest ciut więcej, choć w dalszym ciągu nie możesz sobie pozwolić na dłuższe przestoje. Podbiegnij do ukazanego na screenie miejsca i wciśnij klawisz akcji (#2).
 |  |
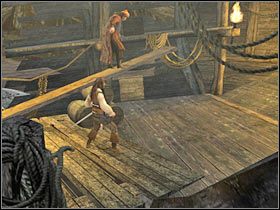
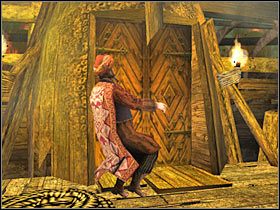
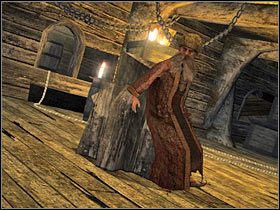
Musisz teraz cierpliwie zaczekać aż zjawi się tu Pirate Lord. Przejdzie on po desce (#1), a następnie zbliży się do bramy. Gdy tylko brama otworzy się, biegnij w prawo. Będziesz bowiem musiał rozprawić się z ostatnią już grupą najemników (#2). Musisz zadbać o to żeby żadna z tych postaci nie zaatakowała pijanego Pirate Lorda!
 |  |
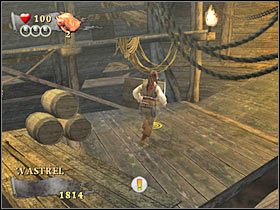
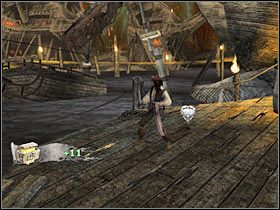
Po wygranym pojedynku pozbieraj oczywiście sakiewki ze złotem. Zaczekaj aż Pirate Lord się tu zjawi. W rezultacie obejrzysz sobie krótki filmik przerywnikowy (#1). Zgodnie z sugestią, będziesz musiał udać się do piratów, których poprzednio zignorowałeś. Znajdziesz ich na prawo od miejsca, w którym aktualnie stoisz (#2).
 | 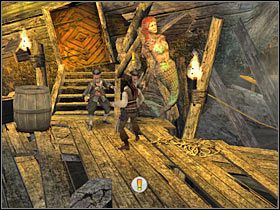 |
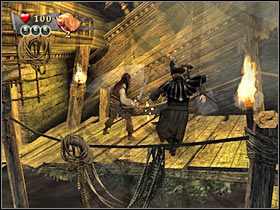
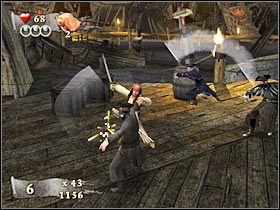
Będziesz musiał teraz wysłuchać stosunkowo krótkiej rozmowy. Okaże się niestety, że piraci mają zamiar cię przechytrzyć. W rezultacie musisz się z nimi rozprawić (#1). Walka ta nie jest szczególnie trudna, chociaż powinieneś częściej niż zazwyczaj blokować. Po wygranym pojedynku będziesz mógł podejść do drzwi, które były pilnowane przez piratów (#2). Otwórz je.
 |  |
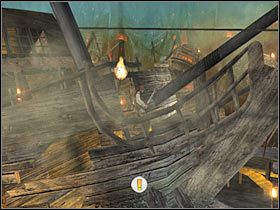
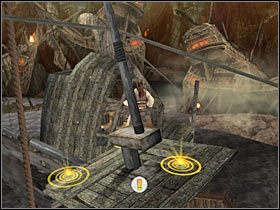
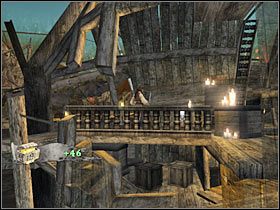
Skieruj się w prawo. Po dotarciu do miejsca z charakterystyczną ikonką użyj oczywiście klawisza akcji (#1), dzięki czemu zjedziesz po linie, trafiając w nowe miejsce planszy. Znajdziesz się na pomoście z trzema interaktywnymi punktami (#2). Z lewego punktu skorzystasz później, prawy prowadzi w okolice miejsca startu, wybierz więc górny. Czeka Cię kolejna przejażdżka z wykorzystaniem liny.
 |  |
Po dotarciu w nowe miejsce nie korzystaj jeszcze ze schodów. Skieruj się w górę i w prawo. Zniszcz skrzynie. To bardzo ważne, gdyż w jednej z nich odnajdziesz trzeci wisiorek (#1). Przedmiot ten należy oczywiście podnieść. Dopiero teraz skieruj się w stronę schodów (#2). Po drodze zniszczysz jeszcze co najmniej jedną skrzynię. Przygotuj się na zdecydowanie dłuższy pojedynek.
 | 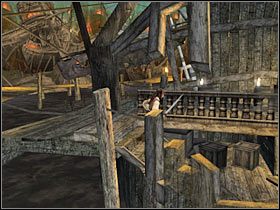 |
Zostaniesz tutaj zaatakowany przez całkiem pokaźną grupę najemników (#1). Walki te będą stosunkowo wymagające, a to dlatego, że najemnicy świetnie wyprowadzają kontrataki. Umiejętnie wyprowadzaj więc kolejne ataki, często korzystając też z opcji bloku. Po wygranych walkach (lub jeszcze w trakcie ich trwania) zniszcz wszystkie okoliczne skrzynie. W jednej z nich odnajdziesz bowiem czwarty wisiorek (#2).
 |  |
Jeśli chcesz, możesz też oczywiście zbadać pozostałe skrzynie, choć o złoto nie będziesz się musiał szczególnie martwić. Możesz już udać się w prawo (#1). Załączy się tu nowa scenka przerywnikowa (#2). Jak zapewne zauważyłeś, więziony jest tu drugi Pirate Lord. Na szczęście ukazany na filmiku najemnik nie jest minibossem, tak więc generalnie nie masz się czego obawiać.
 |  |

- Piraci z Karaibów: Na Krańcu Świata - poradnik do gry
- Piraci z Karaibów: Na Krańcu Świata - poradnik do gry
- Pirates of the Caribbean At World's End: Solucja
- Pirates of the Caribbean At World's End: Misja 1 - Prison Fortress - Subquesty
- Pirates of the Caribbean At World's End: Misja 1 - Prison Fortress (1)
- Pirates of the Caribbean At World's End: Misja 1 - Prison Fortress (2)
- Pirates of the Caribbean At World's End: Misja 1 - Prison Fortress (3)
- Pirates of the Caribbean At World's End: Misja 2 - Isla de Pelegostos - Subquesty
- Pirates of the Caribbean At World's End: Misja 2 - Isla de Pelegostos (1)
- Pirates of the Caribbean At World's End: Misja 2 - Isla de Pelegostos (2)
- Pirates of the Caribbean At World's End: Misja 2 - Isla de Pelegostos (3)
- Pirates of the Caribbean At World's End: Misja 3 - Port Royal - Subquesty
- Pirates of the Caribbean At World's End: Misja 3 - Port Royal (1)
- Pirates of the Caribbean At World's End: Misja 3 - Port Royal (2)
- Pirates of the Caribbean At World's End: Misja 3 - Port Royal (3)
- Pirates of the Caribbean At World's End: Misja 4 - Pearl Vs Dutchman - Subquesty
- Pirates of the Caribbean At World's End: Misja 4 - Pearl Vs Dutchman (1)
- Pirates of the Caribbean At World's End: Misja 4 - Pearl Vs Dutchman (2)
- Pirates of the Caribbean At World's End: Misja 4 - Pearl Vs Dutchman (3)
- Pirates of the Caribbean At World's End: Misja 5 - Tortuga - Subquesty
- Pirates of the Caribbean At World's End: Misja 5 - Tortuga (1)
- Pirates of the Caribbean At World's End: Misja 5 - Tortuga (2)
- Pirates of the Caribbean At World's End: Misja 5 - Tortuga (3)
- Pirates of the Caribbean At World's End: Misja 5 - Tortuga (4)
- Pirates of the Caribbean At World's End: Misja 6 - Isla Cruces - Subquesty
- Pirates of the Caribbean At World's End: Misja 6 - Isla Cruces (1)
- Pirates of the Caribbean At World's End: Misja 6 - Isla Cruces (2)
- Pirates of the Caribbean At World's End: Misja 6 - Isla Cruces (3)
- Pirates of the Caribbean At World's End: Misja 7 - Pearl Vs Kraken - Subquesty
- Pirates of the Caribbean At World's End: Misja 7 - Pearl Vs Kraken (1)
- Pirates of the Caribbean At World's End: Misja 7 - Pearl Vs Kraken (2)
- Pirates of the Caribbean At World's End: Misja 8 - Singapore - Subquesty
- Pirates of the Caribbean At World's End: Misja 8 - Singapore (1)
- Pirates of the Caribbean At World's End: Misja 8 - Singapore (2)
- Pirates of the Caribbean At World's End: Misja 8 - Singapore (3)
- Pirates of the Caribbean At World's End: Misja 9 - Davy Jones' Locker - Subquesty
- Pirates of the Caribbean At World's End: Misja 9 - Davy Jones' Locker (1)
- Pirates of the Caribbean At World's End: Misja 9 - Davy Jones' Locker (2)
- Pirates of the Caribbean At World's End: Misja 9 - Davy Jones' Locker (3)
- Pirates of the Caribbean At World's End: Misja 10 - Sea Battle - Subquesty
- Pirates of the Caribbean At World's End: Misja 10 - Sea Battle (1)
- Pirates of the Caribbean At World's End: Misja 10 - Sea Battle (2)
- Pirates of the Caribbean At World's End: Misja 10 - Sea Battle (3)
- Pirates of the Caribbean At World's End: Misja 11 - Shipwreck City - Subquesty
- Pirates of the Caribbean At World's End: Misja 11 - Shipwreck City (1)
- Pirates of the Caribbean At World's End: Misja 11 - Shipwreck City (2)
- Pirates of the Caribbean At World's End: Misja 11 - Shipwreck City (3)
- Pirates of the Caribbean At World's End: Misja 11 - Shipwreck City (4)
- Pirates of the Caribbean At World's End: Misja 12 - Maelstrom - Subquesty
- Pirates of the Caribbean At World's End: Misja 12 - Maelstrom - (1)
- Pirates of the Caribbean At World's End: Misja 12 - Maelstrom - (2)
- Pirates of the Caribbean At World's End: Misja 12 - Maelstrom - (3)
- Pirates of the Caribbean At World's End: Solucja
- Piraci z Karaibów: Na Krańcu Świata - poradnik do gry
Komentarze czytelników

ach 3 dni się męczyłem żeby znaleść dojście do wodospadu
I takie poradniki lubię... Zresztą "Stranger" robi NAJLEPSZE poradniki!!! Pozdrowienia dla niego! ;)
Zabrania się kopiowanie jakichkolwiek obrazków, tekstów lub informacji zawartych na tej stronie. Strona nie jest powiązana i/lub wspierana przez twórców ani wydawców. Wszystkie loga i obrazki są objęte prawami autorskimi należącymi do ich twórców.
Copyright © 2000 - 2026 Webedia Polska SA wszelkie prawa zastrzeżone.