Pirates of the Caribbean At World's End: Misja 6 - Isla Cruces (1)
Aktualizacja:
Dokładny opis przejścia misji:
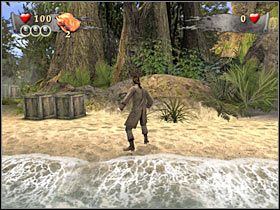
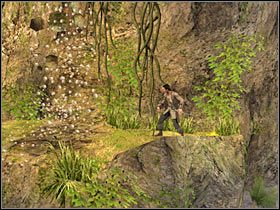
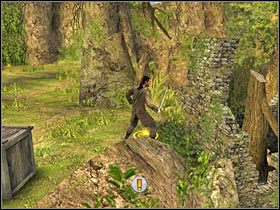
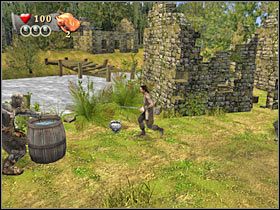
Po wysłuchaniu krótkiego komentarza ze strony Jacka znajdziesz się na plaży (#1). Powinieneś oczywiście zniszczyć wszystkie skrzynie, gdyż w środku odnajdziesz złoto. Nie będzie ci ono co prawda potrzebne do żadnego z subquestów, ale zawsze warto je zbierać. Zbadaj też teren na lewo od łodzi. Wejdź do dżungli i zniszcz dwie pierwsze skrzynie (#2). NIE idź jednak dalej, gdyż zablokowałbyś sobie w ten sposób drogę do pierwszego wisiorka. Wracaj na plażę. Oczywiście, jeśli chcesz wszystko zobaczyć, możesz spróbować pokonać kilka pułapek. Dotarłbyś też do ruchomych piasków.
 |  |
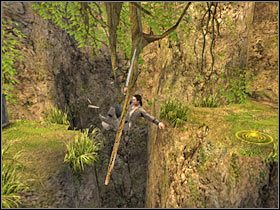
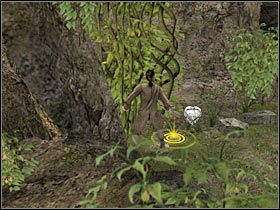
Skieruj się w prawo. W pierwszej kolejności radziłbym zniszczyć skrzynie znajdujące się w dolnej części ekranu. W jednej z nich znajduje się bowiem pierwszy wisiorek (#1). Pozostałe skrzynie będą zawierały sakiewki ze złotem. Dopiero teraz będziesz mógł skorzystać z pobliskiej drabiny (#2). W tym celu wciśnij klawisz akcji.
 |  |
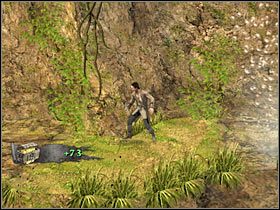
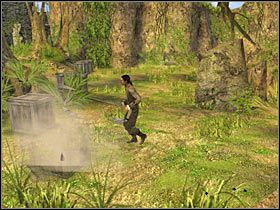
Zatrzymaj się. Zauważ, że co jakiś czas z wyższej półki spadają kamienie (#1). NIE MOŻESZ się do nich zbliżyć, gdyż oznaczałoby to natychmiastową śmierć. Zaczekaj na właściwy moment. Zniszcz skrzynię, a następnie wciśnij klawisz akcji (#2), dzięki czemu będziesz mógł w bezpieczny sposób przedostać się na sąsiednią półkę.
 |  |
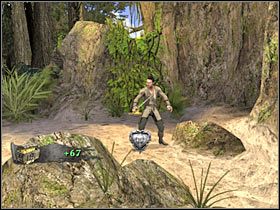
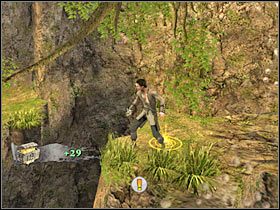
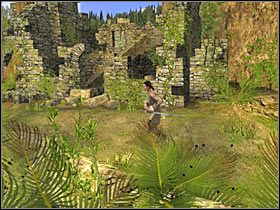
Niszcz oczywiście kolejne skrzynie, gdyż w większości z nich znajdziesz sakiewki ze złotem. Tym razem będziesz musiał ominąć dwie pułapki ze skałami (#1). Nie powinno ci to przysporzyć większych problemów. Ponownie skorzystaj z miecza, podchodząc do zaznaczonego przez grę punktu (#2).
 |  |
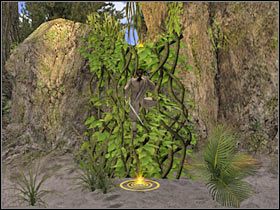
Po znalezieniu się na większej polanie ruszaj w stronę dolnej części ekranu. Będziesz musiał zlokalizować punkt, w którym zejdziesz na niższy poziom (#1). Po dotarciu na miejsce zniszcz pojedynczą skrzynię, a będziesz mógł podnieść drugi wisiorek (#2). Nie idź w prawo, gdyż wpadłbyś w pułapkę i musiałbyś rozpoczynać cały etap od początku. Zamiast tego wróć się na górę.
 |  |
Zniszcz teraz wszystkie pozostałe skrzynie (#1). Podobnie jak wcześniej, podniesiesz sakiewki ze złotem. Wracaj na górę. Nie korzystaj z drabiny, gdyż zupełnie nie będzie ci ona potrzebna. Jedyna różnica polega na tym, iż do wioski zjechałbyś przy użyciu liny. Zamiast tego skieruj się w lewo (#2). Przygotuj się też do pierwszej poważnej walki.
 |  |
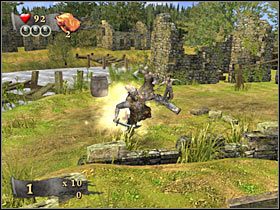
Po dotarciu na miejsce w okolicy zaczną pojawiać się tubylcy. Radziłbym jednak chwilowo z nimi nie walczyć, tylko zniszczyć okoliczną skrzynię (#1). W środku odnajdziesz trzeci wisiorek. W przeciwnym wypadku w ferworze walki mógłbyś stracić okazję na zdobycie tego przedmiotu, gdyż niedługo po zniszczeniu skrzyni znika on z planszy. Dopiero teraz będziesz mógł skoncentrować się na przeciwnikach (#2).
 |  |
- Piraci z Karaibów: Na Krańcu Świata - poradnik do gry
- Piraci z Karaibów: Na Krańcu Świata - poradnik do gry
- Pirates of the Caribbean At World's End: Solucja
- Pirates of the Caribbean At World's End: Misja 1 - Prison Fortress - Subquesty
- Pirates of the Caribbean At World's End: Misja 1 - Prison Fortress (1)
- Pirates of the Caribbean At World's End: Misja 1 - Prison Fortress (2)
- Pirates of the Caribbean At World's End: Misja 1 - Prison Fortress (3)
- Pirates of the Caribbean At World's End: Misja 2 - Isla de Pelegostos - Subquesty
- Pirates of the Caribbean At World's End: Misja 2 - Isla de Pelegostos (1)
- Pirates of the Caribbean At World's End: Misja 2 - Isla de Pelegostos (2)
- Pirates of the Caribbean At World's End: Misja 2 - Isla de Pelegostos (3)
- Pirates of the Caribbean At World's End: Misja 3 - Port Royal - Subquesty
- Pirates of the Caribbean At World's End: Misja 3 - Port Royal (1)
- Pirates of the Caribbean At World's End: Misja 3 - Port Royal (2)
- Pirates of the Caribbean At World's End: Misja 3 - Port Royal (3)
- Pirates of the Caribbean At World's End: Misja 4 - Pearl Vs Dutchman - Subquesty
- Pirates of the Caribbean At World's End: Misja 4 - Pearl Vs Dutchman (1)
- Pirates of the Caribbean At World's End: Misja 4 - Pearl Vs Dutchman (2)
- Pirates of the Caribbean At World's End: Misja 4 - Pearl Vs Dutchman (3)
- Pirates of the Caribbean At World's End: Misja 5 - Tortuga - Subquesty
- Pirates of the Caribbean At World's End: Misja 5 - Tortuga (1)
- Pirates of the Caribbean At World's End: Misja 5 - Tortuga (2)
- Pirates of the Caribbean At World's End: Misja 5 - Tortuga (3)
- Pirates of the Caribbean At World's End: Misja 5 - Tortuga (4)
- Pirates of the Caribbean At World's End: Misja 6 - Isla Cruces - Subquesty
- Pirates of the Caribbean At World's End: Misja 6 - Isla Cruces (1)
- Pirates of the Caribbean At World's End: Misja 6 - Isla Cruces (2)
- Pirates of the Caribbean At World's End: Misja 6 - Isla Cruces (3)
- Pirates of the Caribbean At World's End: Misja 7 - Pearl Vs Kraken - Subquesty
- Pirates of the Caribbean At World's End: Misja 7 - Pearl Vs Kraken (1)
- Pirates of the Caribbean At World's End: Misja 7 - Pearl Vs Kraken (2)
- Pirates of the Caribbean At World's End: Misja 8 - Singapore - Subquesty
- Pirates of the Caribbean At World's End: Misja 8 - Singapore (1)
- Pirates of the Caribbean At World's End: Misja 8 - Singapore (2)
- Pirates of the Caribbean At World's End: Misja 8 - Singapore (3)
- Pirates of the Caribbean At World's End: Misja 9 - Davy Jones' Locker - Subquesty
- Pirates of the Caribbean At World's End: Misja 9 - Davy Jones' Locker (1)
- Pirates of the Caribbean At World's End: Misja 9 - Davy Jones' Locker (2)
- Pirates of the Caribbean At World's End: Misja 9 - Davy Jones' Locker (3)
- Pirates of the Caribbean At World's End: Misja 10 - Sea Battle - Subquesty
- Pirates of the Caribbean At World's End: Misja 10 - Sea Battle (1)
- Pirates of the Caribbean At World's End: Misja 10 - Sea Battle (2)
- Pirates of the Caribbean At World's End: Misja 10 - Sea Battle (3)
- Pirates of the Caribbean At World's End: Misja 11 - Shipwreck City - Subquesty
- Pirates of the Caribbean At World's End: Misja 11 - Shipwreck City (1)
- Pirates of the Caribbean At World's End: Misja 11 - Shipwreck City (2)
- Pirates of the Caribbean At World's End: Misja 11 - Shipwreck City (3)
- Pirates of the Caribbean At World's End: Misja 11 - Shipwreck City (4)
- Pirates of the Caribbean At World's End: Misja 12 - Maelstrom - Subquesty
- Pirates of the Caribbean At World's End: Misja 12 - Maelstrom - (1)
- Pirates of the Caribbean At World's End: Misja 12 - Maelstrom - (2)
- Pirates of the Caribbean At World's End: Misja 12 - Maelstrom - (3)
- Pirates of the Caribbean At World's End: Solucja
- Piraci z Karaibów: Na Krańcu Świata - poradnik do gry
Komentarze czytelników

ach 3 dni się męczyłem żeby znaleść dojście do wodospadu
I takie poradniki lubię... Zresztą "Stranger" robi NAJLEPSZE poradniki!!! Pozdrowienia dla niego! ;)
Zabrania się kopiowanie jakichkolwiek obrazków, tekstów lub informacji zawartych na tej stronie. Strona nie jest powiązana i/lub wspierana przez twórców ani wydawców. Wszystkie loga i obrazki są objęte prawami autorskimi należącymi do ich twórców.
Copyright © 2000 - 2026 Webedia Polska SA wszelkie prawa zastrzeżone.