Pirates of the Caribbean At World's End: Misja 10 - Sea Battle (2)
Aktualizacja:
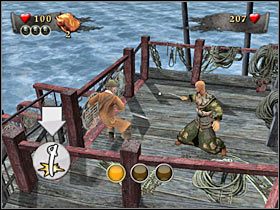
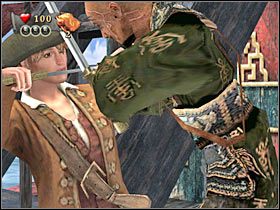
W opisie subquestu wspomniałem też o interaktywnych scenkach, które powinieneś już doskonale znać (#1). Musisz je oczywiście wygrywać, tym bardziej, iż każda taka scenka da ci możliwość pozbawienia bossa około 30-40 punktów zdrowia. Po zakończeniu pierwszej fazy pojedynku wyświetli się krótki filmik przerywnikowy (#2).
 | 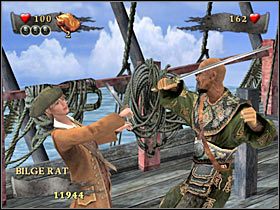 |
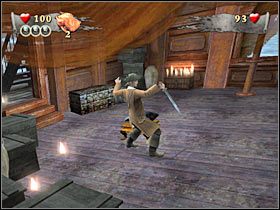
UPEWNIJ SIĘ, że trzymasz klawisz bloku, gdyż walka rozpocznie się właściwie bez żadnego ostrzeżenia (#1). W dalszym ciągu musisz czekać na odpowiedni ruch ze strony bossa i kontratakować (#2). Wykorzystaj także interaktywną scenkę, w której powinieneś za kilka chwil wziąć udział.
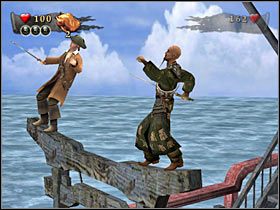 |  |
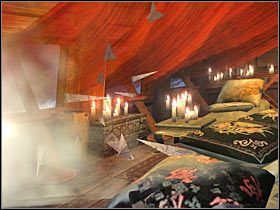
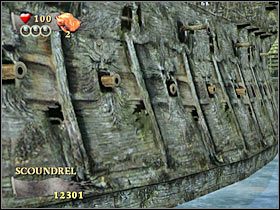
Przed Tobą kolejny filmik przerywnikowy (#1). Na szczęście w czasie jego trwania nie będziesz musiał wciskać żadnych dodatkowych klawiszy. Znajdziesz się w nowym miejscu. Przystąpisz tu do finałowej części pojedynku z bossem. Właściwie nie powinieneś nic zmieniać. Czekaj na okazję do przeprowadzenia ataku, skutecznie blokując wszystkie uderzenia ze strony bossa. Dodatkowo mógłbyś użyć znajdującego się tu obiektu (#2), choć byłoby to nieco ryzykowne. Atak ten odebrałby jednak przeciwnikowi około 50 punktów zdrowia.
 |  |
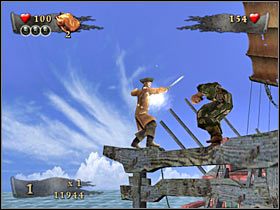
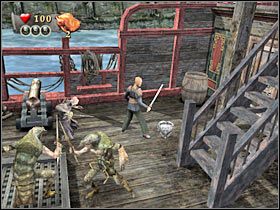
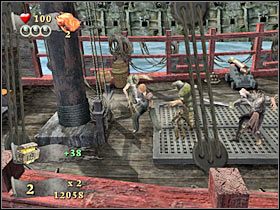
Po wygranej walce będziesz musiał obejrzeć aż dwie scenki przerywnikowe. Ważniejsza będzie ta druga, a to dlatego, iż okręt Sao Fenga zostanie zaatakowany (#1). W rezultacie przystąpisz do kolejnych walk. Zaczynasz na pokładzie okrętu wspomnianego osobnika (#2). Nie przejmuj się pierwszą eksplozją, aczkolwiek na kolejne już będziesz musiał uważać. Zostanie to objaśnione za kilka chwil.
 |  |
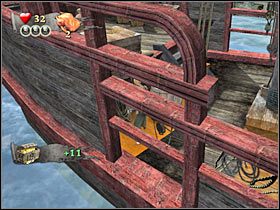
Na razie powinieneś skoncentrować się wyłącznie na zniszczeniu skrzyni, w której znajduje się trzeci wisiorek (#1). Przesuń się teraz w lewo i zacznij atakować potwory. Trzymaj się jednak ukazanego na screenie sektora mapy (#2). Jest to bardzo ważne.
 |  |
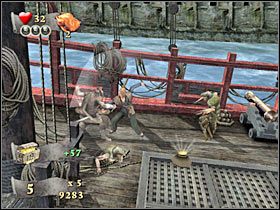
Po chwili załączy się krótka animacja z ostrzału ze strony Flying Dutchmana (#1). Oznacza to, iż masz około dwóch sekund na znalezienie kryjówki. Musisz ustawić się w jednym z miejsc oznaczonych na pomarańczowo (#2). W przeciwnym wypadku straciłbyś wszystkie punkty zdrowia i musiałbyś rozpoczynać zabawę od nowa. Nie skupiaj się więc na eliminacji potworów, gdyż one i tak zginą w wyniku eksplozji. Blokuj ich ataki aż do momentu przeprowadzenia ostrzału.
 |  |
Operację tę będziesz jeszcze musiał kilka razy powtórzyć. Atakuj więc jedynie pojedyncze stwory (#1), nie oddalając się zbytnio od osłoniętych punktów. Gdy pojawi się animacja ostrzału, uciekaj w bezpieczne miejsce. Dopiero w pewnym momencie rozgrywki załączy się inna scenka przerywnikowa, w wyniku czego znajdziesz się pod pokładem (#2).
 |  |

- Piraci z Karaibów: Na Krańcu Świata - poradnik do gry
- Piraci z Karaibów: Na Krańcu Świata - poradnik do gry
- Pirates of the Caribbean At World's End: Solucja
- Pirates of the Caribbean At World's End: Misja 1 - Prison Fortress - Subquesty
- Pirates of the Caribbean At World's End: Misja 1 - Prison Fortress (1)
- Pirates of the Caribbean At World's End: Misja 1 - Prison Fortress (2)
- Pirates of the Caribbean At World's End: Misja 1 - Prison Fortress (3)
- Pirates of the Caribbean At World's End: Misja 2 - Isla de Pelegostos - Subquesty
- Pirates of the Caribbean At World's End: Misja 2 - Isla de Pelegostos (1)
- Pirates of the Caribbean At World's End: Misja 2 - Isla de Pelegostos (2)
- Pirates of the Caribbean At World's End: Misja 2 - Isla de Pelegostos (3)
- Pirates of the Caribbean At World's End: Misja 3 - Port Royal - Subquesty
- Pirates of the Caribbean At World's End: Misja 3 - Port Royal (1)
- Pirates of the Caribbean At World's End: Misja 3 - Port Royal (2)
- Pirates of the Caribbean At World's End: Misja 3 - Port Royal (3)
- Pirates of the Caribbean At World's End: Misja 4 - Pearl Vs Dutchman - Subquesty
- Pirates of the Caribbean At World's End: Misja 4 - Pearl Vs Dutchman (1)
- Pirates of the Caribbean At World's End: Misja 4 - Pearl Vs Dutchman (2)
- Pirates of the Caribbean At World's End: Misja 4 - Pearl Vs Dutchman (3)
- Pirates of the Caribbean At World's End: Misja 5 - Tortuga - Subquesty
- Pirates of the Caribbean At World's End: Misja 5 - Tortuga (1)
- Pirates of the Caribbean At World's End: Misja 5 - Tortuga (2)
- Pirates of the Caribbean At World's End: Misja 5 - Tortuga (3)
- Pirates of the Caribbean At World's End: Misja 5 - Tortuga (4)
- Pirates of the Caribbean At World's End: Misja 6 - Isla Cruces - Subquesty
- Pirates of the Caribbean At World's End: Misja 6 - Isla Cruces (1)
- Pirates of the Caribbean At World's End: Misja 6 - Isla Cruces (2)
- Pirates of the Caribbean At World's End: Misja 6 - Isla Cruces (3)
- Pirates of the Caribbean At World's End: Misja 7 - Pearl Vs Kraken - Subquesty
- Pirates of the Caribbean At World's End: Misja 7 - Pearl Vs Kraken (1)
- Pirates of the Caribbean At World's End: Misja 7 - Pearl Vs Kraken (2)
- Pirates of the Caribbean At World's End: Misja 8 - Singapore - Subquesty
- Pirates of the Caribbean At World's End: Misja 8 - Singapore (1)
- Pirates of the Caribbean At World's End: Misja 8 - Singapore (2)
- Pirates of the Caribbean At World's End: Misja 8 - Singapore (3)
- Pirates of the Caribbean At World's End: Misja 9 - Davy Jones' Locker - Subquesty
- Pirates of the Caribbean At World's End: Misja 9 - Davy Jones' Locker (1)
- Pirates of the Caribbean At World's End: Misja 9 - Davy Jones' Locker (2)
- Pirates of the Caribbean At World's End: Misja 9 - Davy Jones' Locker (3)
- Pirates of the Caribbean At World's End: Misja 10 - Sea Battle - Subquesty
- Pirates of the Caribbean At World's End: Misja 10 - Sea Battle (1)
- Pirates of the Caribbean At World's End: Misja 10 - Sea Battle (2)
- Pirates of the Caribbean At World's End: Misja 10 - Sea Battle (3)
- Pirates of the Caribbean At World's End: Misja 11 - Shipwreck City - Subquesty
- Pirates of the Caribbean At World's End: Misja 11 - Shipwreck City (1)
- Pirates of the Caribbean At World's End: Misja 11 - Shipwreck City (2)
- Pirates of the Caribbean At World's End: Misja 11 - Shipwreck City (3)
- Pirates of the Caribbean At World's End: Misja 11 - Shipwreck City (4)
- Pirates of the Caribbean At World's End: Misja 12 - Maelstrom - Subquesty
- Pirates of the Caribbean At World's End: Misja 12 - Maelstrom - (1)
- Pirates of the Caribbean At World's End: Misja 12 - Maelstrom - (2)
- Pirates of the Caribbean At World's End: Misja 12 - Maelstrom - (3)
- Pirates of the Caribbean At World's End: Solucja
- Piraci z Karaibów: Na Krańcu Świata - poradnik do gry
Komentarze czytelników

ach 3 dni się męczyłem żeby znaleść dojście do wodospadu
I takie poradniki lubię... Zresztą "Stranger" robi NAJLEPSZE poradniki!!! Pozdrowienia dla niego! ;)
Zabrania się kopiowanie jakichkolwiek obrazków, tekstów lub informacji zawartych na tej stronie. Strona nie jest powiązana i/lub wspierana przez twórców ani wydawców. Wszystkie loga i obrazki są objęte prawami autorskimi należącymi do ich twórców.
Copyright © 2000 - 2026 Webedia Polska SA wszelkie prawa zastrzeżone.