Pirates of the Caribbean At World's End: Misja 2 - Isla de Pelegostos (1)
Aktualizacja:
Dokładny opis przejścia misji:
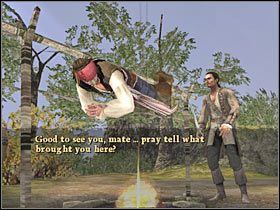
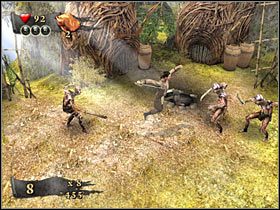
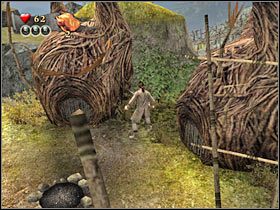
Zabawę rozpoczniesz już na wyspie. Na początek będziesz oczywiście musiał obejrzeć krótki filmik przerywnikowy (#1). Zauważ też, że w tej misji będziesz sterował inną postacią. Będzie to Will Turner. Zabawa nie zmieni się jednak w jakiś drastyczny sposób. Praktycznie od razu będziesz natomiast musiał przystąpić do walki (#2). Główny bohater zostanie bowiem zaatakowany przez kilku tubylców.
 | 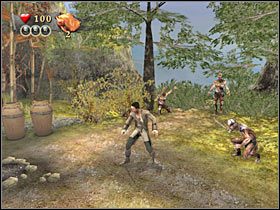 |
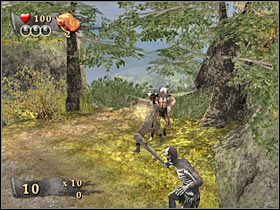
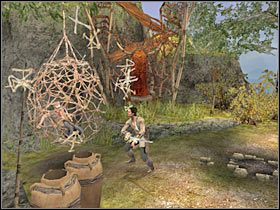
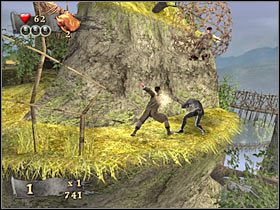
Pokonanie tubylców nie powinno ci sprawić dużych problemów. Co więcej, będziesz tu mógł wypełnić jeden z głównych celów tej misji, czyli zdobyć Combo x15 (#1). Nie jest to jednak wymagane. Po wygranej walce koniecznie zniszcz wszystkie wazy. Większość z nich będzie zawierała sakiewki ze złotem. W jednej z waz odnajdziesz jednak pierwszy wisiorek (#2). Podnieś go.
 | 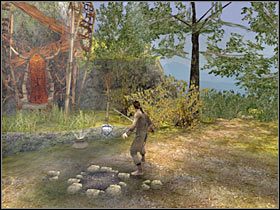 |
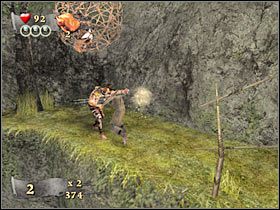
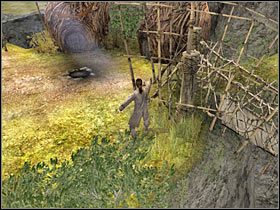
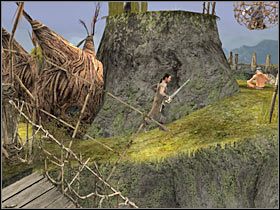
Skieruj się teraz kawałek w lewo. Podejdź do znajdującej się tu pierwszej klatki i wciśnij klawisz akcji, dzięki czemu uwolnisz więźnia (#1). Zniszcz pozostałe wazy, a następnie zacznij kierować się w lewo. Będziesz musiał pokonać pojedynczego tubylca (#2). Nie powinieneś mieć z tym żadnych problemów. Uwolnij drugiego więźnia, ponownie wciskając klawisz akcji.
 |  |
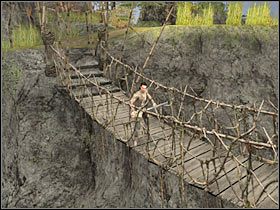
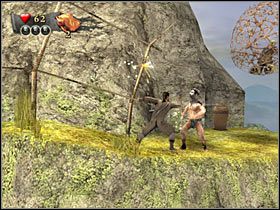
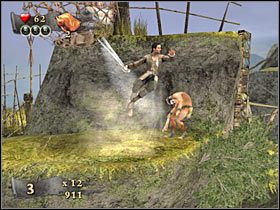
Wróć się teraz w prawo. Będziesz musiał zlokalizować most, znajdujący się w dolnej części ekranu. Skorzystaj z niego (#1). Na moście zostaniesz zaatakowany przez minibossa, którego bardzo łatwo będzie można jednak pokonać (#2), głównie dlatego, iż dysponuje on zaledwie 50 punktami zdrowia. Możesz ruszać dalej.
 | 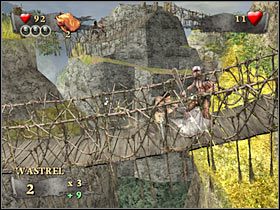 |
Skieruj się w prawo. Po dotarciu do większego obozu w pierwszej kolejności będziesz musiał rozprawić się z nową grupą tubylców (#1). Nie próbuj jednak zawalczyć o potrzebne combo, gdyż nie ma tu ich zbyt wielu. Po zakończonych walkach koniecznie zniszcz wszystkie wazy. W obiekcie ukazanym na screenie (znajduje się on przy prawym moście) odnajdziesz drugi wisiorek (#2).
 |  |
Zanim skorzystasz z prawego mostku, powinieneś zbadać znajdujące się w tej okolicy TRZY przejścia. Zacznijmy od lewej strony (#1). Po zejściu na dół skieruj się w prawo. Pokonaj pojedynczego tubylca (#2) i uwolnij trzeciego już więźnia. Nie zapomnij o zniszczeniu waz! Wracaj do centralnej części obozowiska.
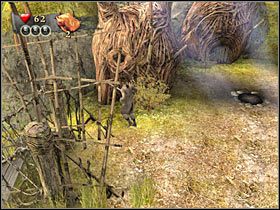 |  |
Teraz będziesz musiał skierować się do centralnego przejścia, znajdującego się za krzakami (#1). Jest ono dość dobrze ukryte, ale jeśli zerkniesz na screena, powinieneś je odnaleźć. Podobnie jak wcześniej, będziesz musiał pozbawić życia pojedynczego tubylca (#2), a następnie zająć się więźniem. Wracaj do obozu.
 |  |
Na koniec pozostała ci jeszcze tylko ścieżka, znajdująca się w prawej górnej części obozowiska (#1). Przesuwaj się cały czas w prawo. Podobnie jak wcześniej, należy pokonać tubylca (#2). Uwolnij piątego więźnia. Wracaj do obozu i spróbuj skorzystać z większego mostu, który poprzednio ignorowałeś.
 |  |

- Piraci z Karaibów: Na Krańcu Świata - poradnik do gry
- Piraci z Karaibów: Na Krańcu Świata - poradnik do gry
- Pirates of the Caribbean At World's End: Solucja
- Pirates of the Caribbean At World's End: Misja 1 - Prison Fortress - Subquesty
- Pirates of the Caribbean At World's End: Misja 1 - Prison Fortress (1)
- Pirates of the Caribbean At World's End: Misja 1 - Prison Fortress (2)
- Pirates of the Caribbean At World's End: Misja 1 - Prison Fortress (3)
- Pirates of the Caribbean At World's End: Misja 2 - Isla de Pelegostos - Subquesty
- Pirates of the Caribbean At World's End: Misja 2 - Isla de Pelegostos (1)
- Pirates of the Caribbean At World's End: Misja 2 - Isla de Pelegostos (2)
- Pirates of the Caribbean At World's End: Misja 2 - Isla de Pelegostos (3)
- Pirates of the Caribbean At World's End: Misja 3 - Port Royal - Subquesty
- Pirates of the Caribbean At World's End: Misja 3 - Port Royal (1)
- Pirates of the Caribbean At World's End: Misja 3 - Port Royal (2)
- Pirates of the Caribbean At World's End: Misja 3 - Port Royal (3)
- Pirates of the Caribbean At World's End: Misja 4 - Pearl Vs Dutchman - Subquesty
- Pirates of the Caribbean At World's End: Misja 4 - Pearl Vs Dutchman (1)
- Pirates of the Caribbean At World's End: Misja 4 - Pearl Vs Dutchman (2)
- Pirates of the Caribbean At World's End: Misja 4 - Pearl Vs Dutchman (3)
- Pirates of the Caribbean At World's End: Misja 5 - Tortuga - Subquesty
- Pirates of the Caribbean At World's End: Misja 5 - Tortuga (1)
- Pirates of the Caribbean At World's End: Misja 5 - Tortuga (2)
- Pirates of the Caribbean At World's End: Misja 5 - Tortuga (3)
- Pirates of the Caribbean At World's End: Misja 5 - Tortuga (4)
- Pirates of the Caribbean At World's End: Misja 6 - Isla Cruces - Subquesty
- Pirates of the Caribbean At World's End: Misja 6 - Isla Cruces (1)
- Pirates of the Caribbean At World's End: Misja 6 - Isla Cruces (2)
- Pirates of the Caribbean At World's End: Misja 6 - Isla Cruces (3)
- Pirates of the Caribbean At World's End: Misja 7 - Pearl Vs Kraken - Subquesty
- Pirates of the Caribbean At World's End: Misja 7 - Pearl Vs Kraken (1)
- Pirates of the Caribbean At World's End: Misja 7 - Pearl Vs Kraken (2)
- Pirates of the Caribbean At World's End: Misja 8 - Singapore - Subquesty
- Pirates of the Caribbean At World's End: Misja 8 - Singapore (1)
- Pirates of the Caribbean At World's End: Misja 8 - Singapore (2)
- Pirates of the Caribbean At World's End: Misja 8 - Singapore (3)
- Pirates of the Caribbean At World's End: Misja 9 - Davy Jones' Locker - Subquesty
- Pirates of the Caribbean At World's End: Misja 9 - Davy Jones' Locker (1)
- Pirates of the Caribbean At World's End: Misja 9 - Davy Jones' Locker (2)
- Pirates of the Caribbean At World's End: Misja 9 - Davy Jones' Locker (3)
- Pirates of the Caribbean At World's End: Misja 10 - Sea Battle - Subquesty
- Pirates of the Caribbean At World's End: Misja 10 - Sea Battle (1)
- Pirates of the Caribbean At World's End: Misja 10 - Sea Battle (2)
- Pirates of the Caribbean At World's End: Misja 10 - Sea Battle (3)
- Pirates of the Caribbean At World's End: Misja 11 - Shipwreck City - Subquesty
- Pirates of the Caribbean At World's End: Misja 11 - Shipwreck City (1)
- Pirates of the Caribbean At World's End: Misja 11 - Shipwreck City (2)
- Pirates of the Caribbean At World's End: Misja 11 - Shipwreck City (3)
- Pirates of the Caribbean At World's End: Misja 11 - Shipwreck City (4)
- Pirates of the Caribbean At World's End: Misja 12 - Maelstrom - Subquesty
- Pirates of the Caribbean At World's End: Misja 12 - Maelstrom - (1)
- Pirates of the Caribbean At World's End: Misja 12 - Maelstrom - (2)
- Pirates of the Caribbean At World's End: Misja 12 - Maelstrom - (3)
- Pirates of the Caribbean At World's End: Solucja
- Piraci z Karaibów: Na Krańcu Świata - poradnik do gry
Komentarze czytelników

ach 3 dni się męczyłem żeby znaleść dojście do wodospadu
I takie poradniki lubię... Zresztą "Stranger" robi NAJLEPSZE poradniki!!! Pozdrowienia dla niego! ;)
Zabrania się kopiowanie jakichkolwiek obrazków, tekstów lub informacji zawartych na tej stronie. Strona nie jest powiązana i/lub wspierana przez twórców ani wydawców. Wszystkie loga i obrazki są objęte prawami autorskimi należącymi do ich twórców.
Copyright © 2000 - 2026 Webedia Polska SA wszelkie prawa zastrzeżone.