Pirates of the Caribbean At World's End: Misja 6 - Isla Cruces (2)
Aktualizacja:
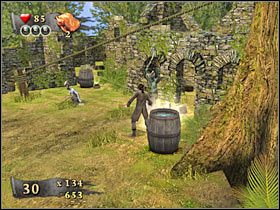
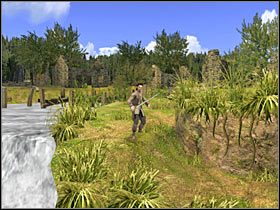
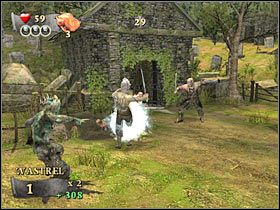
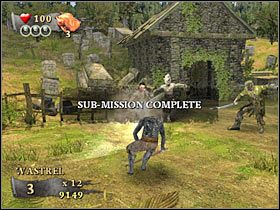
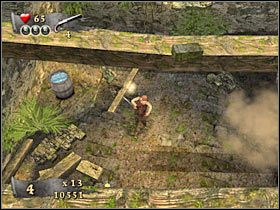
Jak już powiedziałem, walka ta jest najlepszą okazją do tego żeby nabić sobie odpowiednio wysoki combosek (#1). Używaj przede wszystkim ataku specjalnego. Często zmieniaj też cele. Na szczęście tubylcy rzadziej kontratakują od żołnierzy i bandziorów z poprzedniej misji. Po zakończonych walkach skieruj się w lewo (#2).
 |  |
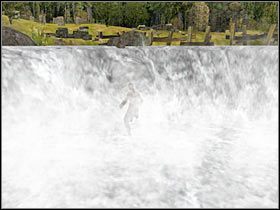
Po kilku chwilach powinieneś dotrzeć do wodospadu (#1). Na szczęście nie będziesz musiał martwić się o stracenie równowagi. Uważaj jedynie na spadające z góry bale drewna, których nie będzie na szczęście zbyt wiele. Pojawią się tu nowi wrogowie (#2), z którymi należy się oczywiście rozprawić.
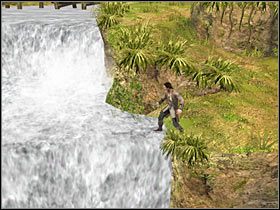 |  |
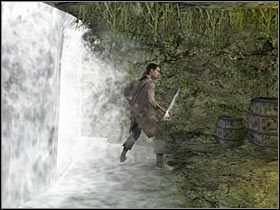
Po wygranej walce nie opuszczaj jeszcze tego terenu. Będziesz bowiem musiał odnaleźć bożka, stanowiącego jeden z pobocznych celów tego etapu. W tym celu udaj się do środkowej części wodospadu i skorzystaj z mało widocznego przejścia (#1). Po znalezieniu się w środku (#2) przejdź w prawo i podnieś figurkę. Możesz już wracać na zewnątrz. Udaj się w lewo.
 |  |
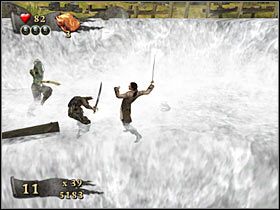
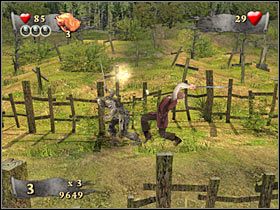
Dotrzesz w końcu do miejsca, w którym gra załaduje nową planszę (#1). Teraz będziesz mógł przystąpić do zadania związanego z ochranianiem cywilów. Znajdują się oni w charakterystycznej dziurze. Twoje zadanie polega na nie dopuszczaniu żadnego z tubylców w okolice dziury (#2). Nie koncentruj się wyłącznie na zabijaniu przeciwników. Bardziej staraj się ich odepchnąć, wykonując odpowiednie ataki.
 |  |
Jednocześnie musisz unikać bomb, na które zwróciłeś już zapewne wcześniej uwagę. W tym celu staraj się powstrzymywać określonych tubylców przed używaniem tych przedmiotów. Po upływie wyznaczonego czasu otrzymasz stosowną informację (#1). Po chwili załączy się kolejna scenka przerywnikowa (#2). Przez kilkadziesiąt najbliższych sekund będziesz sterował Miss Elizabeth.
 |  |
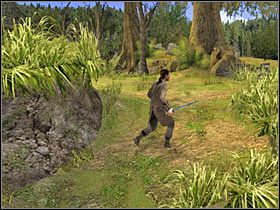
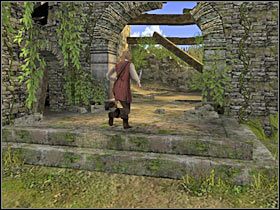
Ruszaj w lewo. Po chwili wpadniesz na minibossa, którego bardzo łatwo będzie można jednak pokonać. Wykonuj silniejsze ataki, używając oczywiście klawisza X (#1). Co najmniej raz będziesz też musiał zablokować atak bossa. Skieruj się teraz w stronę pobliskich ruin (#2). Do celu prowadzi tylko jedna ścieżka (mnóstwo niewidzialnych ścian), tak więc nie możesz się zgubić.
 |  |
Przed Tobą kolejne walki. Osobiście radziłbym jednak w pierwszej kolejności zainteresować się prawą skrzynią, gdyż odnajdziesz w niej czwarty wisiorek (#1). Dopiero teraz skup się na przeciwnikach. Niestety, pojedynek ten będzie znacznie trudniejszy, a to dlatego, iż ataki Elizabeth są słabsze od tych dwóch pozostałych bohaterów.
 |  |

- Piraci z Karaibów: Na Krańcu Świata - poradnik do gry
- Piraci z Karaibów: Na Krańcu Świata - poradnik do gry
- Pirates of the Caribbean At World's End: Solucja
- Pirates of the Caribbean At World's End: Misja 1 - Prison Fortress - Subquesty
- Pirates of the Caribbean At World's End: Misja 1 - Prison Fortress (1)
- Pirates of the Caribbean At World's End: Misja 1 - Prison Fortress (2)
- Pirates of the Caribbean At World's End: Misja 1 - Prison Fortress (3)
- Pirates of the Caribbean At World's End: Misja 2 - Isla de Pelegostos - Subquesty
- Pirates of the Caribbean At World's End: Misja 2 - Isla de Pelegostos (1)
- Pirates of the Caribbean At World's End: Misja 2 - Isla de Pelegostos (2)
- Pirates of the Caribbean At World's End: Misja 2 - Isla de Pelegostos (3)
- Pirates of the Caribbean At World's End: Misja 3 - Port Royal - Subquesty
- Pirates of the Caribbean At World's End: Misja 3 - Port Royal (1)
- Pirates of the Caribbean At World's End: Misja 3 - Port Royal (2)
- Pirates of the Caribbean At World's End: Misja 3 - Port Royal (3)
- Pirates of the Caribbean At World's End: Misja 4 - Pearl Vs Dutchman - Subquesty
- Pirates of the Caribbean At World's End: Misja 4 - Pearl Vs Dutchman (1)
- Pirates of the Caribbean At World's End: Misja 4 - Pearl Vs Dutchman (2)
- Pirates of the Caribbean At World's End: Misja 4 - Pearl Vs Dutchman (3)
- Pirates of the Caribbean At World's End: Misja 5 - Tortuga - Subquesty
- Pirates of the Caribbean At World's End: Misja 5 - Tortuga (1)
- Pirates of the Caribbean At World's End: Misja 5 - Tortuga (2)
- Pirates of the Caribbean At World's End: Misja 5 - Tortuga (3)
- Pirates of the Caribbean At World's End: Misja 5 - Tortuga (4)
- Pirates of the Caribbean At World's End: Misja 6 - Isla Cruces - Subquesty
- Pirates of the Caribbean At World's End: Misja 6 - Isla Cruces (1)
- Pirates of the Caribbean At World's End: Misja 6 - Isla Cruces (2)
- Pirates of the Caribbean At World's End: Misja 6 - Isla Cruces (3)
- Pirates of the Caribbean At World's End: Misja 7 - Pearl Vs Kraken - Subquesty
- Pirates of the Caribbean At World's End: Misja 7 - Pearl Vs Kraken (1)
- Pirates of the Caribbean At World's End: Misja 7 - Pearl Vs Kraken (2)
- Pirates of the Caribbean At World's End: Misja 8 - Singapore - Subquesty
- Pirates of the Caribbean At World's End: Misja 8 - Singapore (1)
- Pirates of the Caribbean At World's End: Misja 8 - Singapore (2)
- Pirates of the Caribbean At World's End: Misja 8 - Singapore (3)
- Pirates of the Caribbean At World's End: Misja 9 - Davy Jones' Locker - Subquesty
- Pirates of the Caribbean At World's End: Misja 9 - Davy Jones' Locker (1)
- Pirates of the Caribbean At World's End: Misja 9 - Davy Jones' Locker (2)
- Pirates of the Caribbean At World's End: Misja 9 - Davy Jones' Locker (3)
- Pirates of the Caribbean At World's End: Misja 10 - Sea Battle - Subquesty
- Pirates of the Caribbean At World's End: Misja 10 - Sea Battle (1)
- Pirates of the Caribbean At World's End: Misja 10 - Sea Battle (2)
- Pirates of the Caribbean At World's End: Misja 10 - Sea Battle (3)
- Pirates of the Caribbean At World's End: Misja 11 - Shipwreck City - Subquesty
- Pirates of the Caribbean At World's End: Misja 11 - Shipwreck City (1)
- Pirates of the Caribbean At World's End: Misja 11 - Shipwreck City (2)
- Pirates of the Caribbean At World's End: Misja 11 - Shipwreck City (3)
- Pirates of the Caribbean At World's End: Misja 11 - Shipwreck City (4)
- Pirates of the Caribbean At World's End: Misja 12 - Maelstrom - Subquesty
- Pirates of the Caribbean At World's End: Misja 12 - Maelstrom - (1)
- Pirates of the Caribbean At World's End: Misja 12 - Maelstrom - (2)
- Pirates of the Caribbean At World's End: Misja 12 - Maelstrom - (3)
- Pirates of the Caribbean At World's End: Solucja
- Piraci z Karaibów: Na Krańcu Świata - poradnik do gry
Komentarze czytelników

ach 3 dni się męczyłem żeby znaleść dojście do wodospadu
I takie poradniki lubię... Zresztą "Stranger" robi NAJLEPSZE poradniki!!! Pozdrowienia dla niego! ;)
Zabrania się kopiowanie jakichkolwiek obrazków, tekstów lub informacji zawartych na tej stronie. Strona nie jest powiązana i/lub wspierana przez twórców ani wydawców. Wszystkie loga i obrazki są objęte prawami autorskimi należącymi do ich twórców.
Copyright © 2000 - 2026 Webedia Polska SA wszelkie prawa zastrzeżone.